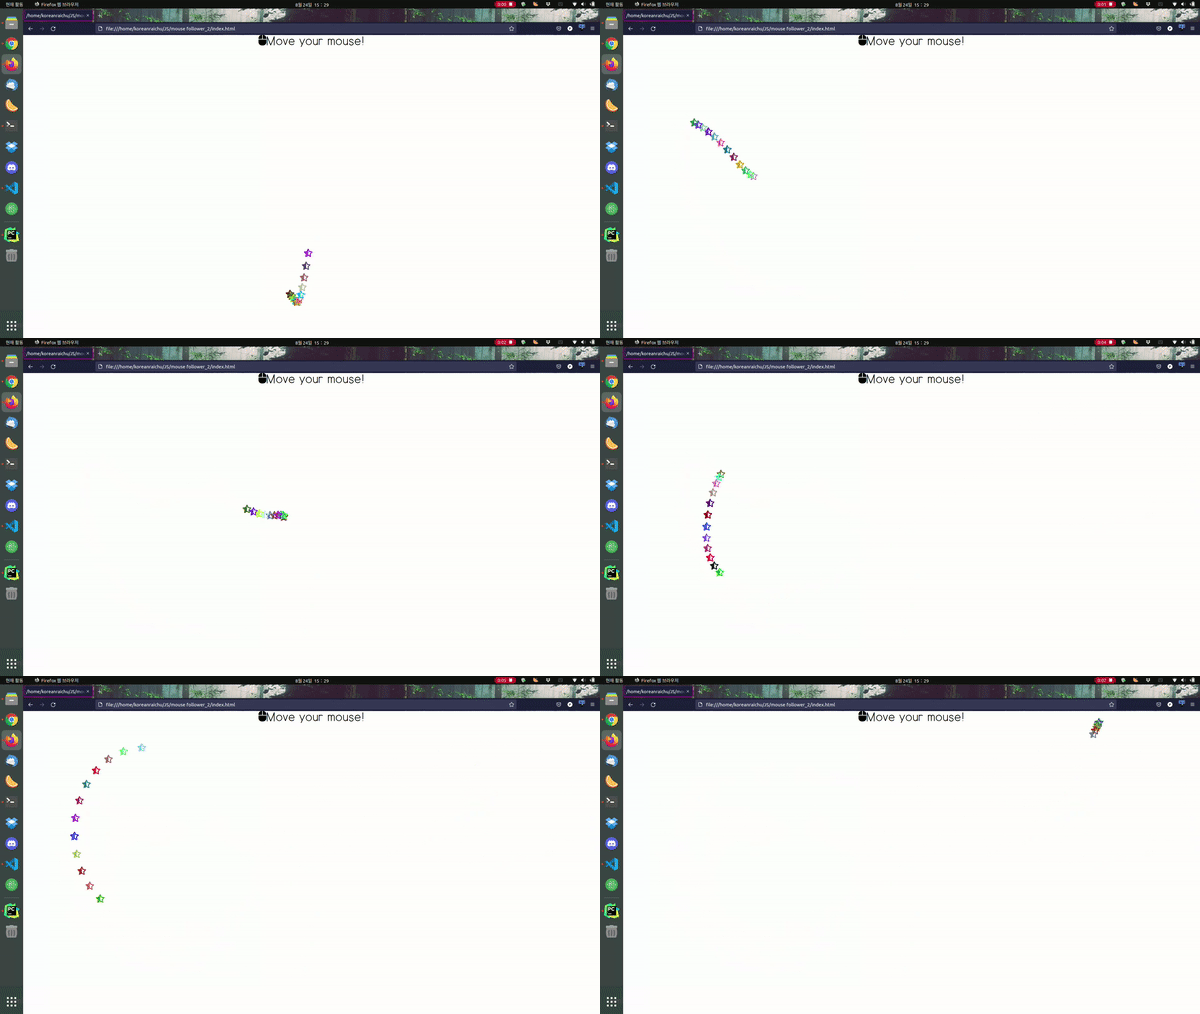
참고로 티스토리 블로그에도 적용해뒀다. 워드프레스는 HTML이나 JS는 건드릴 수 없어서 적용 못했고 네이버나 미디움은 HTML쪽 편집이 안돼서 적용 못했음.
Reference
https://stickode.tistory.com/318 ([JavaScript] 마우스를 따라다니는 원 만들기)
https://codepen.io/falldowngoboone/pen/PwzPYv (Javascript Mouse Trail)
Basic

스크린캐스트에 커서는 안찍히는데 커서 따라가는 거 맞다.
<html>

<head>
    <link rel="stylesheet" href="style.css">
</head>

<body>
    <div class="mousefollow">

    </div>
    <div class="wrapper">
        <p>Move your mouse! </p>
    </div>

    <script src="script.js"></script>

    <body>

</html>
마우스를 따라다닐 div 하나 만들어주면 HTML은 끝이다.
@font-face {
    font-family: 'EarlyFontDiary';
    src: url('https://cdn.jsdelivr.net/gh/projectnoonnu/noonfonts_220508@1.0/EarlyFontDiary.woff2') format('woff2');
    font-weight: normal;
    font-style: normal;
}

* {
    margin: 0;
    padding: 0;
    font-family: 'EarlyFontDiary';
}

p {
    font-size:25pt;
    text-align:center;
    height:50%;
}

.mousefollow {
    position:absolute;
    left:0;
    right:0;
    width:50px;
    height:50px;
    border-radius:50px;
    background-color:blueviolet;
}
아, CSS에서 position 지정 안해주면 안 움직인다.
const mousefollow = document.querySelector('.mousefollow');

document.addEventListener('mousemove',(e) => {
    const mouseX = e.clientX;
    const mouseY = e.clientY;
    mousefollow.style.left = mouseX + 'px';
    mousefollow.style.top = mouseY + 'px';
})
심지어 이건 자바스크립트 코드도 개 심플하다.
화려하게 따라와DALA
결과물부터 보고 가자.


티스토리에 적용할 생각 없냐고? 이거 적용하면 구경왔다가 눈아프다고 다 갈듯.
<html>

<head>
    <link rel="stylesheet" href="style.css">
</head>

<body>
    <div class="wrapper">
        <p>Move your mouse! </p>
    </div>

    <script src="script.js"></script>

    <body>

</html>
HTML은 아무것도 없는 동양화의 정수. 근데 저게 어떻게 되냐고? 이따 JS 보면 압니다.
@font-face {
    font-family: 'EarlyFontDiary';
    src: url('https://cdn.jsdelivr.net/gh/projectnoonnu/noonfonts_220508@1.0/EarlyFontDiary.woff2') format('woff2');
    font-weight: normal;
    font-style: normal;
}

* {
    margin: 0;
    padding: 0;
    font-family: 'EarlyFontDiary';
}

p {
    font-size:25pt;
    text-align:center;
}

.follower {
    font-size:20pt;
    text-align:left;
    position:absolute;
    left:0;
    right:0;
    width:15px;
		background-color:#f7cac9;
    height:15px;
    border-radius:15px;
    transition: all 0.1s ease-out;
}
응? CSS에 백그라운드 컬러가 있는데 화려하다고요? 아 그건 이따 설명해드림. 이거 원본에서도 단색이었음.
// dots is an array of Dot objects,
// mouse is an object used to track the X and Y position
// of the mouse, set with a mousemove event listener below
var dots = [],
    mouse = {
        x: 0,
        y: 0
    };

// The Dot object used to scaffold the dots
var Dot = function () {
    this.x = 0;
    this.y = 0;
    this.node = (function () {
        var n = document.createElement("div");
        n.className = "follower";
        document.body.appendChild(n);
        return n;
    }());
};
// The Dot.prototype.draw() method sets the position of
// the object's <div> node
Dot.prototype.draw = function () {
    this.node.style.left = this.x + "px";
    this.node.style.top = this.y + "px";
};

// Creates the Dot objects, populates the dots array
for (var i = 0; i < 12; i++) {
    var d = new Dot();
    dots.push(d);
}

// This is the screen redraw function
function draw() {
    // Make sure the mouse position is set everytime
    // draw() is called.
    var x = mouse.x,
        y = mouse.y;

    // This loop is where all the 90s magic happens
    dots.forEach(function (dot, index, dots) {
        var nextDot = dots[index + 1] || dots[0];

        dot.x = x;
        dot.y = y;
        dot.draw();
        x += (nextDot.x - dot.x) * .6;
        y += (nextDot.y - dot.y) * .6;

    });
}

addEventListener("mousemove", function (event) {
    //event.preventDefault();
    mouse.x = event.pageX;
    mouse.y = event.pageY;
});

// animate() calls draw() then recursively calls itself
// everytime the screen repaints via requestAnimationFrame().
function animate() {
    draw();
    requestAnimationFrame(animate);
}

// And get it started by calling animate().
animate();
이게 원본 코드인데, 원래 단색이다. 아까 HTML에서 아무것도 없었다고 했는데, JS가 첨가되면서 for문을 통해 요소를 만들고 클래스명을 붙이게 되면 마우스를 따라다니는 점이 생성되게 된다. 그래서… 색깔 랜덤 어떻게 했냐고?
function getRandomColor() {
    const r = Math.floor(Math.random() * 256).toString(16).padStart(2,'0');
    const g = Math.floor(Math.random() * 256).toString(16).padStart(2,'0');
    const b = Math.floor(Math.random() * 256).toString(16).padStart(2,'0');
    return "#" + r + g + b;
}
Dot.prototype.draw = function () {
this.node.style.left = this.x + "px";
this.node.style.top = this.y + "px";
this.node.style.backgroundColor = getRandomColor();
};위 코드는 색상을 랜덤으로 생성하는 코드(256으로 해야 00~FF까지 나온다)이고, 아래 코드는 점(div) 색깔을 위에서 만든 색으로 적용하는 코드이다. 그래서 위에 나왔던것처럼 개 화려한 동그라미가 우다다다 나오는 것.
var Dot = function () {
    this.x = 0;
    this.y = 0;
    this.node = (function () {
        var n = document.createElement("div");
        n.innerHTML= '<i class="fa-solid fa-palette"></i>'
        n.className = "follower";
        document.body.appendChild(n);
        return n;
    }());
};
// The Dot.prototype.draw() method sets the position of
// the object's <div> node
Dot.prototype.draw = function () {
    this.node.style.left = this.x + "px";
    this.node.style.top = this.y + "px";
    this.node.style.color = getRandomColor();
};
아이콘은 div를 생성하고 안을 FontAwesome 아이콘으로 채운 것. 이렇게 하려면 div에 줬던 높이랑 너비를 빼야 한다.
var Dot = function () {
    this.x = 0;
    this.y = 0;
    this.node = (function () {
        var n = document.createElement("div");
        var random_content = ['<i class="fa-solid fa-lemon"></i>','<i class="fa-solid fa-star-half-stroke"></i>','<i class="fa-solid fa-star"></i>','<i class="fa-solid fa-thumbs-up"></i>','<i class="fa-solid fa-meteor"></i>','<i class="fa-solid fa-heart"></i>','<i class="fa-solid fa-star-of-life"></i>','<i class="fa-solid fa-moon"></i>']
        n.innerHTML= random_content[Math.floor(Math.random() * random_content.length)];
        n.className = "follower";
        document.body.appendChild(n);
        return n;
    }());
};
그럼 여기까지 보신 분들은 도대체! 아이콘은 어케한거임? 하실텐데, 간단하다. 랜덤으로 뽑고 싶은 아이콘들을 배열에 담고, 그 배열의 인덱스를 랜덤으로 정해서 인덱싱하게 되면 복불복으로 뽑힌다. 진정한 안구테러


Reply